
Clear Transparent PMMA Discs: Surgical Guides, Try-In Bases & Occlusal Splints
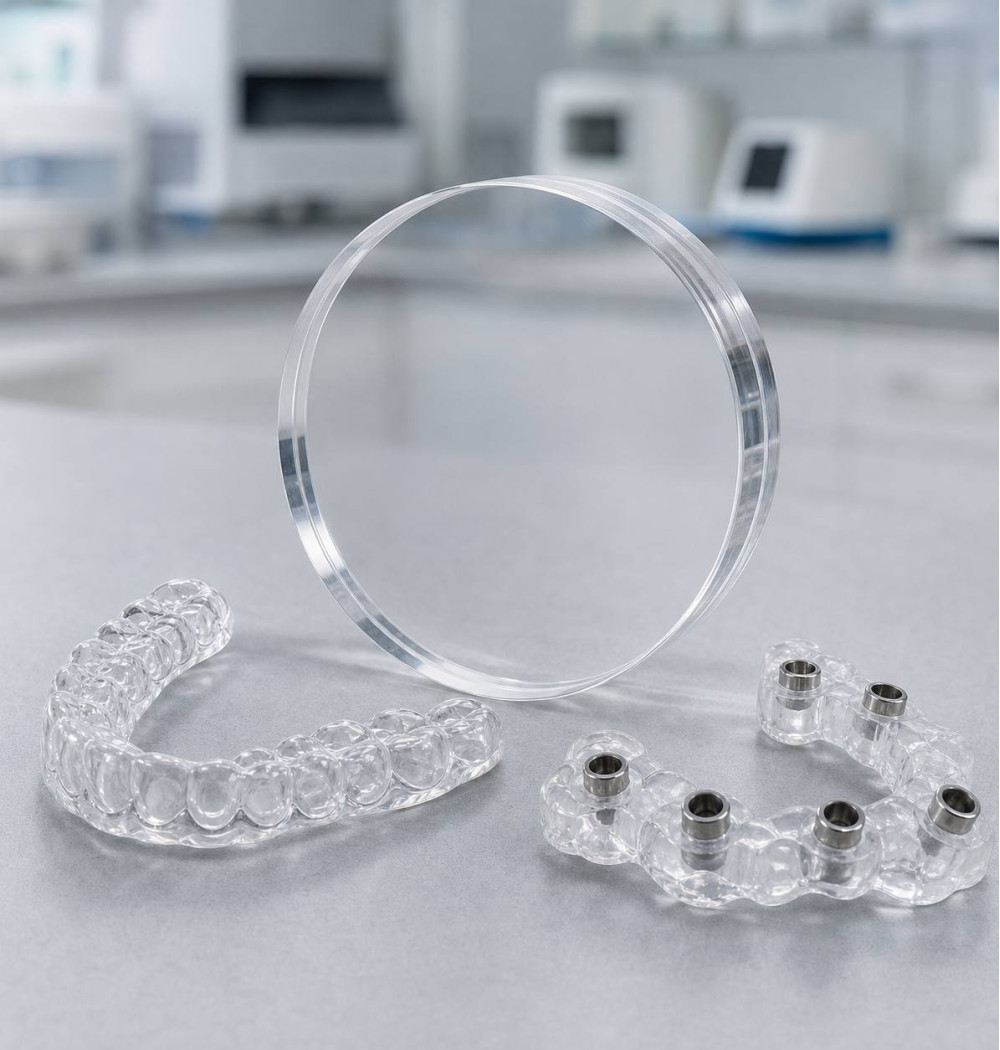
Most labs stock tooth-shade PMMA for temporaries and ignore the clear stuff. That's a mistake: clear transparent PMMA discs cover workflows tooth-shade material cannot touch—surgical guides, try-in bases, and hard occlusal splints. I keep clear stock beside the common A-shades because these jobs arrive often enough to justify the slot.
What Makes Clear PMMA Different from Tooth-Shade PMMA
The base polymer is the same polymethyl methacrylate used in conventional dental PMMA discs. The difference is the absence of pigments and opacifiers. Better clear discs are also cross-linked, which improves rigidity, reduces stain uptake, and gives a finished appliance that stays presentable longer.
Optical clarity is a useful manufacturing quality check. Cheap material may look acceptable against a white bench, then reveal haze, extrusion streaks, or micro-bubbles after milling and polishing. Hold a transparent PMMA dental disc over small printed text before loading it. If the letters already look foggy or distorted, polishing won't rescue it.
Clear material exposes every machining defect. A finish that passes easily on an A2 temporary can look like a scratched shop window in transparent PMMA. Tool paths, bur deflection, rough connector removal, and careless sanding all remain visible, so finishing standards need to be higher from the first CAM pass.
Heat matters as well. PMMA has a glass-transition temperature around 105 °C, where it begins losing dimensional stability. That is why clear PMMA appliances are not autoclavable: sterilization cycles at 121–134 °C can warp them. Use an approved chemical or cold-disinfection protocol instead.
Surgical Guides: Where Milled Clear PMMA Still Beats Printing
3D printing owns most of the surgical-guide market now. The per-unit cost is lower, production queues move quickly, and several guides can be built at once. Fair enough. For routine single-unit cases in a properly validated printing workflow, printing is usually the sensible choice.
Milled PMMA still has real advantages. There is no washing or post-cure variability, no concern about an opened resin bottle ageing, and no progressive brittleness caused by an incomplete cure. Reputable medical-grade discs also come with documented biocompatibility, while the subtractive process gives dependable dimensional stability across a long arch. For full-arch cases—and for labs without a genuinely validated printer workflow—I still prefer milling.
Clarity is functional, not cosmetic. The surgeon must see whether the guide is fully seated on teeth or tissue and confirm that the drill sleeves align with the planned sites. An opaque guide hides rocking, soft-tissue interference, and incomplete seating. Flying blind during guided surgery defeats the purpose of the guide.
Most guides nest in 20–25 mm stock, depending on arch curvature, sleeve height, and the orientation permitted by the CAM software. A clear PMMA disc for surgical guides should be thick enough to avoid tilting the design into a poor milling angle just to make it fit. Metal drill sleeves are pressed or bonded after milling. Add inspection windows in CAD wherever seating needs visual confirmation; exocad, 3Shape Implant Studio, and BlueSkyPlan all support that basic design feature.
Disinfect these guides chemically. A 70% isopropyl protocol or a compatible cold-soak product works — follow the disc manufacturer's instructions. Don't send the guide through an autoclave and hope the short cycle saves it. The 105 °C glass-transition point doesn't negotiate.
Try-In Bases and Verification Jigs
A clear milled denture try-in base lets the clinician see the tissue and ridge relationship while evaluating the tooth setup. Pressure areas, incomplete seating, and trapped material are easier to locate than they are beneath an opaque base. In full-arch implant work, a transparent duplicate of the planned prosthesis can also serve as a verification jig: seat it, look through it, and find the gap instead of guessing from one margin. It's a simple use of the material and often more informative than another stone index.
Occlusal Splints and Night Guards: The Volume Use Case
This is where clear PMMA actually earns its position in the disc rack. Hard Michigan-style splints, flat-plane night guards, and anterior deprogrammers are steady, repeatable work. A properly milled appliance has a clean path of insertion, controlled contacts, and enough rigidity for adjustments without the flex of a thin thermoformed shell.
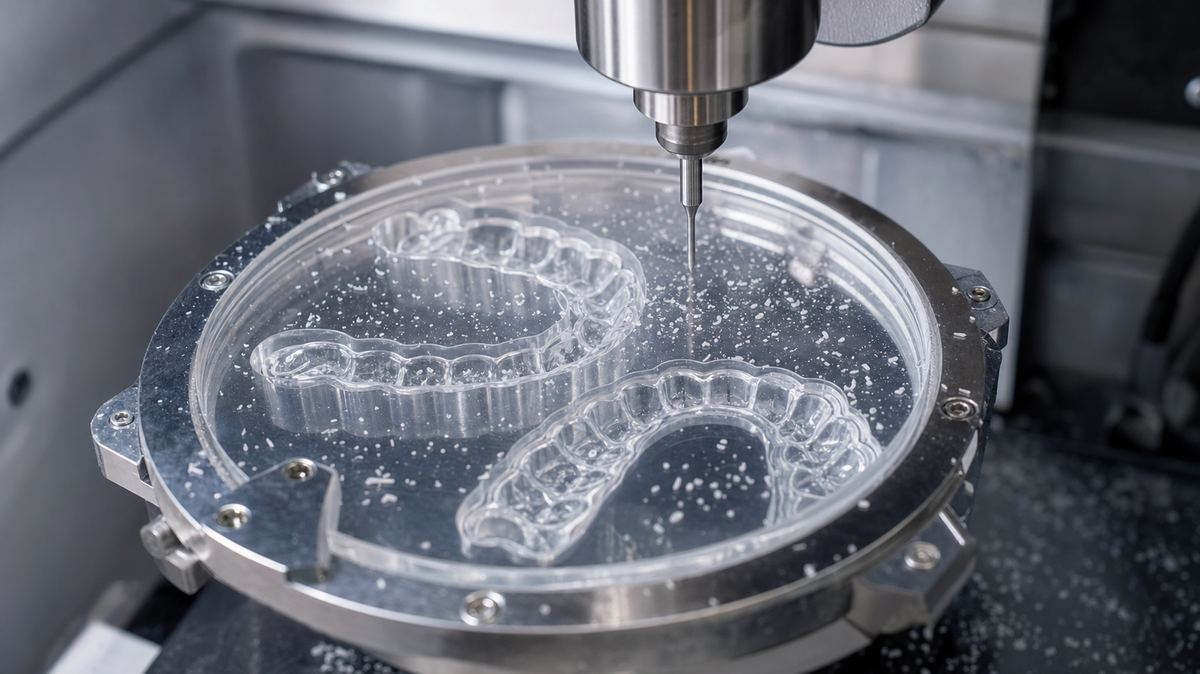
Compared with vacuum-formed appliances, milled splints avoid suck-down distortion and give consistent thickness across the occlusal table and sidewalls. The saved CAD file is another practical advantage. When the patient’s dog eats the first guard—and apparently dogs have excellent access to bedside tables—the replacement can be milled without redesigning the case.
Printed splint resins keep improving, and some validated systems now produce good appliances. I still see enough printed guards yellow, develop surface changes, or become brittle that cross-linked milled PMMA remains my boring, reliable choice. A 20 mm PMMA night guard disc covers most flat-plane splints; small anterior deprogrammers usually fit in thinner stock.
| Method | Fit accuracy | Thickness control | Long-term durability | Cost per unit | Turnaround |
|---|---|---|---|---|---|
| Milled clear PMMA | Excellent and repeatable | Precise throughout | High | Moderate | Same-day possible |
| Vacuum-formed | Good, some distortion | Variable after forming | Moderate | Low | Fastest |
| 3D-printed resin | Good when validated | Precise by design | Resin dependent | Lowest in batches | Fast in batches |
Milling Clear PMMA: Parameters, Burs, and the Transparency Problem
Run PMMA dry at high spindle speed with strong chip extraction. No coolant is needed. Wet milling works when the machine or validated workflow insists on it, but dry chip evacuation is cleaner and makes it easier to see whether the cut is producing proper chips. Use the manufacturer’s PMMA milling speeds and parameters as the starting point, then tune feed and spindle settings for the bur diameter and machine rigidity.
Heat is the failure mode that ruins clear parts. Feed too slowly or run a dull bur and the polymer melts instead of cutting cleanly. Chips re-weld to the surface, flutes pack, and gummy smears become cloudy streaks that may extend too deep to polish away. Recurring bur breakage in PMMA is often the same problem one stage later: packed flutes increase load until the tool snaps.
Use sharp two-flute carbide PMMA milling burs with geometry intended for acrylic. Diamond-coated zirconia burs are the wrong tool. The coating is built for abrasive ceramics, and the geometry doesn't clear a soft thermoplastic. My normal sequence is a 2.5 mm or 2.0 mm flat-end bur for roughing, 1.0 mm for contours, and 0.5–0.6 mm for fine detail. Replace tools based on cut quality, not just an optimistic software counter.
Tighten the stepover on the finish pass compared with what you'd run for a tooth-shade temporary. That adds machine time but removes far more hand-finishing time than it costs. After milling, remove connectors carefully and work through a controlled fine-grit sanding progression. Follow with pumice, then acrylic polishing compound and a clean high-shine buff. Ten to fifteen minutes of deliberate polishing is the difference between an appliance that looks professionally made and one that looks like a bag of scratches.
Disc logistics are straightforward. A shouldered 98mm transparent PMMA disc fits common open-system machines from Roland, VHF, imes-icore, and similar platforms. Zirkonzahn users need a 95mm transparent PMMA disc for Zirkonzahn, while Amann Girrbach systems commonly use 89 mm or 71 mm formats. Available thicknesses usually run from 12 to 25 mm. Choose according to the tallest unit in the nest, including required machining clearance—not according to whichever thickness was loaded last week.
What to Check Before You Buy
- Cross-linking: Cross-linked material is more rigid and takes up less stain than basic non-cross-linked PMMA.
- Optical clarity: Hold the unopened disc over printed text. Haze before milling means haze in the finished splint.
- Biocompatibility: Ask for relevant ISO 10993 testing and applicable CE documentation. This is an intraoral appliance, not a model.
- Format and thickness: Confirm the diameter, shoulder type, and available thicknesses against the actual holder in your machine.
- Storage: Keep discs sealed, clean, and away from UV exposure. Scratched stock creates avoidable finishing work.
Frequently Asked Questions
Can you autoclave a milled PMMA surgical guide?
No. PMMA begins losing dimensional stability around its 105 °C glass-transition temperature, while autoclave cycles operate at 121–134 °C. Use a validated chemical or cold-disinfection method instead.
What thickness clear PMMA disc do I need for a surgical guide?
A 20–25 mm disc covers most cases. Arch curvature, guide height, sleeve position, and CAM orientation determine the final choice.
Can you mill night guards from clear PMMA?
Yes. Hard flat-plane guards and Michigan splints are the main volume applications for this material. Soft and dual-laminate night guards are different products and are normally thermoformed.
Is milled PMMA better than 3D printing for surgical guides?
It depends on production volume and workflow validation. Printing is usually cheaper per guide, while milled PMMA offers strong dimensional stability and better-established material documentation without post-curing variability.
Why does my clear PMMA turn cloudy after milling?
Heat. Dull burs or overly slow feeds melt and smear the surface instead of producing clean chips. Use sharp acrylic burs, keep the feed rate up, and follow a proper sanding and polishing sequence.
Clear PMMA will never be the biggest seller in the material rack, but labs that keep it available stop turning away profitable splint and guide work. One disc slot, three billable workflows—and very little drama once the milling and polishing process is under control.